
At WDS Camp 2016, Brad Williams brought his Raspberry Pi 3. Installed on it was a copy of RetroPie. I had heard about Raspberry Pi before. I wasn’t completely sold on the idea. Once, I almost won a Pi during a WordCamp event. After playing the original Super Mario Bros for hours on end, I decided to order one of my own. It took me a few months to fully break down and order a Raspberry Pi 3 starter kit by Canakit, through Amazon. I did a lot of research. Countless numbers of Google Searches and Youtube videos later, I pressed the purchased button. No Affiliate Links are present on this page. After I purchased the Raspberry Pi 3, I had to decide what I would install on it. That’s where RetroPie comes into play.
There are tons of awesome Raspberry Pi Projects on the internet. After seeing some of the things people were doing, I decided to order a few more. I plan on making a smart mirror next.
What You Will Need

Your Playstation / Xbox controller will be just fine. In my opinion, I suggest using your PS3 Controller if you plan on playing games with many options in them. Mario Kart on Nintendo 64 needs to have more buttons. My Old School NES controllers work just fine. However, I can’t do some of the special moves. Like throwing Banana peels and jumping into turns.
Here’s all the stuff you need to get going:
- Raspberry Pi 3 Starter Kit
- Micro SD Card with Card Reader
- Optional: USB Controllers.
See. I told you it’s a small list. However, I assumed the Micro SD Card came with the Raspberry Pi 3 starter kit. Sadly, it does not. It’s not a deal-breaker, though. You don’t have to get a 128gb card. I’m sure an 8GB will be just fine. I bought the 128gb Micro SD Card at my local BestBuy while it was on sale.
Tip: It’s always a good idea to find the best deal possible. Save that money son!
A few things to know before
After I spent hours searching Youtube and Google, I watched a number of Raspberry Pi 3 & RetroPie tutorials. After they all let me down, I finally figured out what I needed to do. Hence why, this article was written. I want to save you the time and headache I went through. Those videos were not a total let down, they did help me peice this tutorial together.
I should note that this tutorial is for Mac computers only. If you want something for Windows, I suggest finding another article.
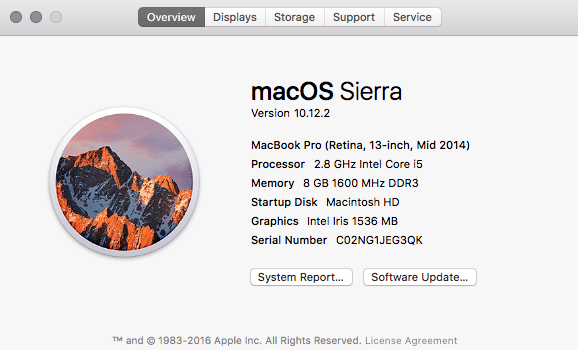
This process is pretty simple and should take less than 20 minutes. Your mileage may vary. Your internet connection and processor speeds will determine the amount of time it will take you. Here’s my current Macbook Pro Setup at the time of this Raspberry Pi 3 tutorial.
Installing RetroPie on Raspberry Pi 3 on a Mac
We’re going to start by assuming you already took your Raspberry Pi 3 out of the box and have it in the case. It’s pretty easy to set up. Put the heatsink’s on after the Raspberry Pi 3 is in the case. It will save you headaches down the road.
- Place Micro SD Card into the Card Reader
- Insert Card Reader into your Macbook Pro.
- Your Macbook Pro will now see the card. If not, try reinstalling the card in the slot.
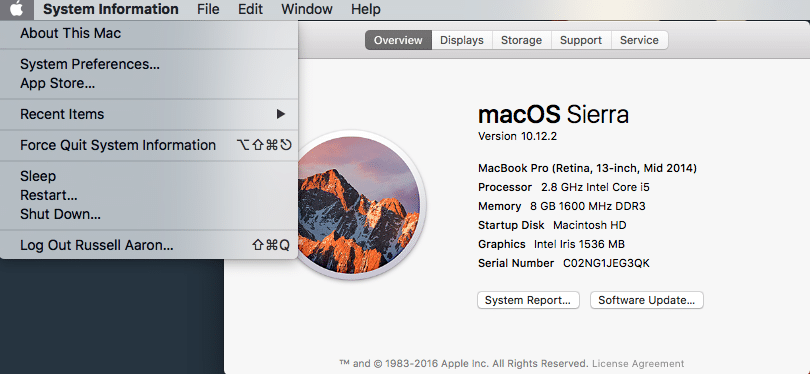
- Click On Apple Icon in the top Task bar. Click on About This Mac.

- Open up the Systen Report. Take note of the BSD Name, under the Tanscend List. This is important.

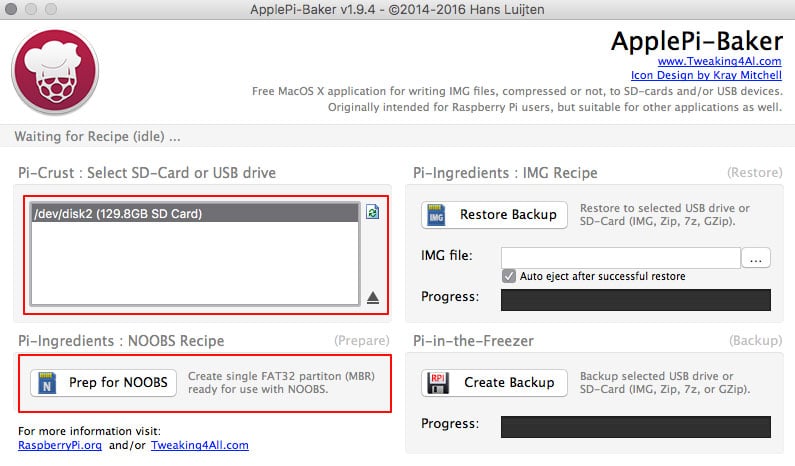
- Format your SD Card to Fat-32. I used Apple Pie Baker. It’s free.
- Fire up Apple Pi Baker & select the Disk. /dev/disk2/ is the same as /dev/disk2s1/. Click Prep for NOOBS. Even though we’re not installing NOOBS, this will format the SD card to the right formatting.

- While Apple Pi Baker finishes, Download RetroPie for Raspberry Pie 3. Download should come in the .zip.gz file extenstion.
- Unzip RetroPie .zip.gz file to your Desktop. Or any other folder on your computer. This actually matters later on. I suggest keeping it on your Desktop for this tutorial. The finished unzipped file should end in the .img extenstion.
- Rename your .img file to something easy. Like retropie.img
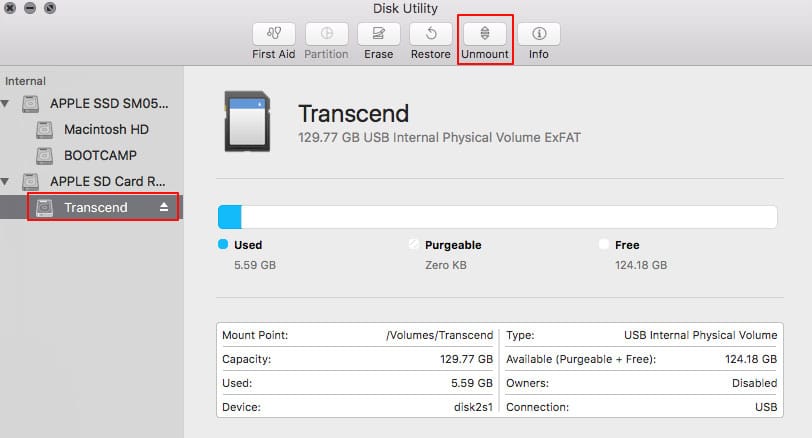
- Start Disk Utility and Unmount SD Card. Do Not Eject. Just Unmount.

- Open the Command Line Tool. I used Alfred to open up the application. You can do the same with the spotlight finder tool. I use iTerm for my command line work.

- Once the command line is open, copy the following command and paste it into the command line tool.
sudo dd if=/Users/YourUserName/Desktop/retropie.img of=/dev/rYOURDISKNUMBER bs=1m
- Press Enter and let the computer do the work.
- Once Command line is done, you can go ahead and eject the Micro SD Card Reader. Fully Eject the card reader.
Using the command line on Mac
Up to this point, we’ve just downloaded a file and unzipped it to our Deskotp. We’ve formatted the SD Card to Fat-32. Now, this is the most technical part of this tutorial. We’re going to open up the command line and execute a command to write the .img to the SD Card. Some of the Following Details are important to note down, and this is Case Sensitive.
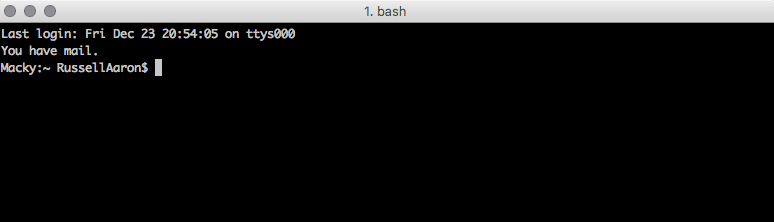
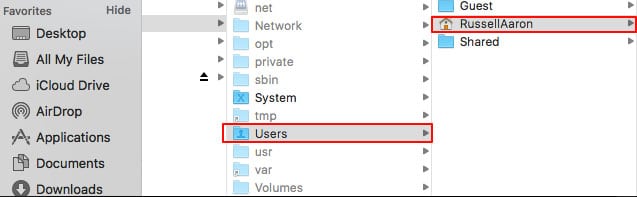
Replace YourUserName with the name of the user you are logged into currently. The spelling of your Username is important. If you have a capital letter in the name, make sure it’s a capital when you place it in the command line tool.
Replace YOURDISKNUMBER with the name of the BSD Name we took note of earlier. Again, the spelling is case sensitive.

This is what my final command line code looks like.
sudo dd if=/Users/RussellAaron/Desktop/retropie.img of=/dev/rdisk2 bs=1m
Congratulations
You have just successfully written the RetroPie .img to the SD Card. We’re ready to now put the Micro SD Card into the Raspberry Pi 3 and turn it on. Connect a USB Keyboard and Controller to the Raspberry Pie 3 before you connect the power cord. Let the Setup Run. If you see a screen asking you to set up your connected controller, things went well. If you don’t. I’d start all over again. Leave a comment below if you were confused by any of this. I’m here to help.
I will be doing a follow-up post. The post will be something like “configuring RetroPie on your Raspberry Pie 3”. I’ll Update the post with a link soon.
Hopefully, you’re set up with RetroPie. There are many Youtube tutorials you can watch for now. Fast Forward to 18:00 minutes. You can see how this person configures the controllers.
Have fun and enjoy your RetroPie on Raspberry Pi 3. I know I have enjoyed it so far.
You mention nowhere about when to move the file from desktop onto the disk. I followed everything, then I realized, there is no step as to when I should move the file. Your help is greatly appreciated.
When you use Apple Pie Baker, or the command line, it will move the file from the desktop to the disk. You don’t physically drag and drop anything. You’re asking the program to take this file and re-write it over on this new place.
Thank you for such clear instructions. I am somewhat new to the Mac and was disappointed when I tried booting the Raspberry Pi with the Retropie imaged micro. I inserted the micro SD, added hdmi, keyboard, game controller, mouse, power plug. Turned it on and noth8ng. Just a red light, no activity. I swapped out my micro card with another with the raspberry os and it works. Plug back the retro micro sd, still nothing. I’ve done this twice already with no success. Any ideas?